Cheque Management
Banks and Credit Unions provide services in terms of Cheque management to facilitate the customer to manage their Cheques issued to the customer. This feature helps the customer track each leaf of a Cheque issued for several accounts they might hold.
Cheque management provides the following options:
- Request for one or more chequebooks.
- View the list of chequebook requests and the status of raised requests.
- Choose between delivering the chequebook to the mailing address or pick up from branch.
- Request to stop payment for one or more cheques for various valid reasons.
- View the status of all the cheques issued to a customer.
- Option to revoke the stop payment of a cheque.
Menu path:
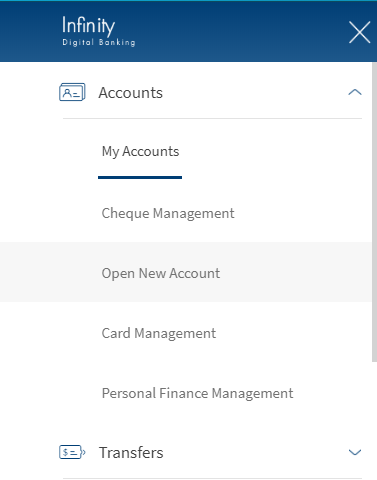
- Web channel: Side menu > Accounts > Cheque Management
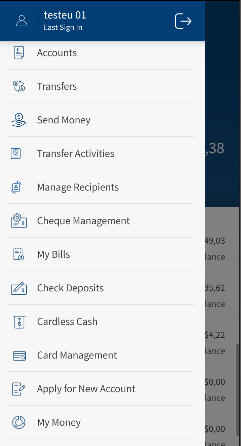
- Mobile Native: Hamburger menu > Accounts > Cheque Management
Business Process Diagram - Manage Cheques

Cheque Management Features
Cheque management provides the following features:
Typically, when a new chequebook request is made by the customer, the request goes directly to the bank and the bank issues a new chequebook to the customer's address or the customer can collect in person at the bank branch.
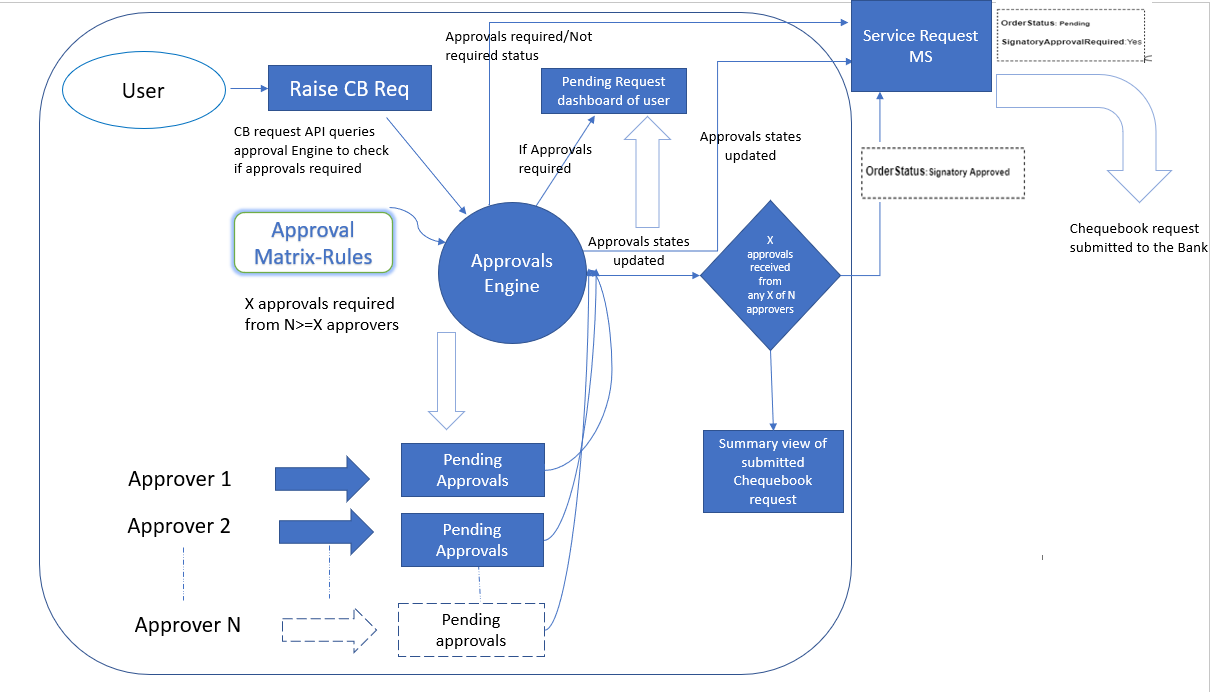
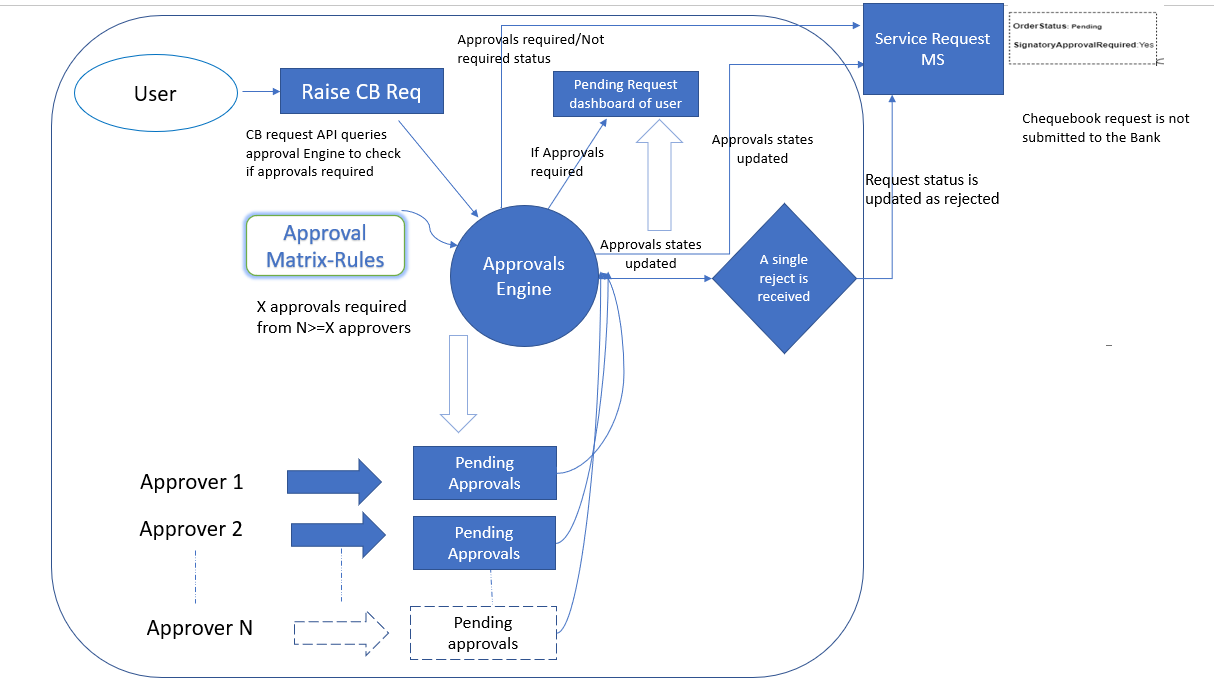
In the banking application, an authorized user with requisite permissions can raise chequebook requests for own accounts. Currently, the bank can decide at the design-time to turn on an approval process for chequebook requests. When a customer submits a request for a new chequebook, the request is queried in the Approvals Engine to check if approval is required. If approvals are required as defined through “Create Cheque Book Requests” rules in the approval matrix, then after the request is submitted, the user is shown a message that the create chequebook request has now been submitted for approval. The request is processed and after the approval of required approvers, the chequebook request is submitted to the bank.
See the flow diagram at the Configuration section that explains the chequebook request process where multiple approvers are involved and scenarios covering the approval and rejection processes.
Approvals Engine Handling: The application queries the approvals engine to deduce all the number of approvals required to authorize the request and send an approval request to all authorized approvals as set up in the approval matrix. The straight-through processing scenarios are also taken care where the initiator is also the approver on a particular transaction.
Submit and handling of create chequebook requests: The submitted request shows under the Pending Requests list of the user (Requests dashboard) with the state appropriately updated as and when approvals on the request are received. The user can withdraw the submitted request and can also see the updated approval states of the request. A chequebook request that has received the required number of approvals is sent to the core banking system for execution.
Approve and handling of create chequebook requests: The submitted request shows under the Pending Approvals list of an approver (approvals dashboard) with the state appropriately updated as and when other approvals on the request are received. The approver can view the details of the request and reject or approve the request.
Action to support approvals on chequebook requests: The surfacing of the cheque request feature on the application is controlled by mandates. Approvals are added to the Create Cheque Book Request Feature action to provide the privileges of approving Create Cheque Book Requests to identified individuals.
Handling the History tab details of a chequebook request: If a chequebook request has been approved/rejected, then and appropriate entry is shown on the History tab approvals and requests dashboard) as well with all the details as shown for a pending request.
Alerts for chequebook request
| Module | Trigger | Alert is sent to |
|---|---|---|
| Check book request - No approvals | Cheque book request is created and submitted to the bank | User who raises request |
| Check book request – Approvals required | User (Initiator) triggers cheque book request |
|
| An Approval is received on the CB request but not submitted | User who raises request | |
| A Rejection is received on the CB request |
|
|
| CB request is submitted to the Bank- final approval |
|
|
| Initiator withdraws the transaction |
|
Note on straight-through processing: If the initiator is also the approver of the same transaction, the authorization on transaction is implicitly counted. In such cases, the initiator will not receive an Approver type alert. This applies to Euro payment flows as well. The following are the two scenarios for straight-through processing:
- There are other approvals required on that specific transaction: In such cases, all the other approvers receive the notification of the request and the initiator who is also an approver, receives only the Initiator type alert.
- There are no other approvals required on that specific transaction: In such cases, the transaction is directly submitted and neither the approver or the initiator (who are the same) receives any Approver type alerts. An alert that the request has been submitted only is triggered.
Chequebook Request
This feature provides the self-service capability for customers to place a request for a chequebook from online and mobile banking.
- Bank Customers receive Chequebook as part of their account facilities availed. If the user is out of Cheque leaves, Order Chequebook allows you to request for new Chequebooks online.
- Customers can choose their preferences for the delivery of Chequebook while submitting the request online as self-service action.
Menu path:
- OLB: Side Menu > Cheque Management > Chequebook Requests
- MB: Hamburger menu > Cheque Management > Chequebook Requests
You can also access Chequebook Requests from Call to Action button of an account in dashboard and quick menu in the account overview screen.
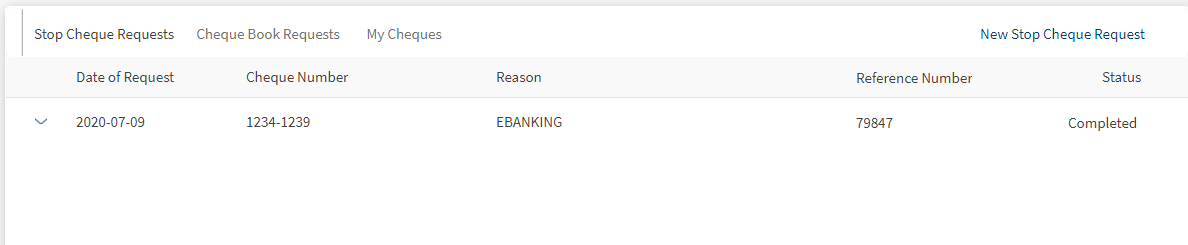
To view the chequebook request, follow these steps:
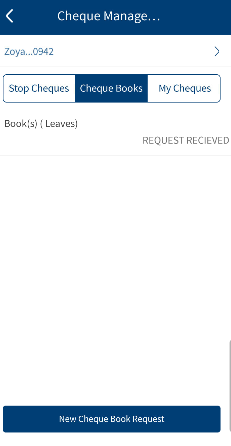
- Click on Cheque Management from the side menu. Stop Cheque Requests tab is displayed by default.
The Chequebook Request screen displays the list of the all the requests raised till date.
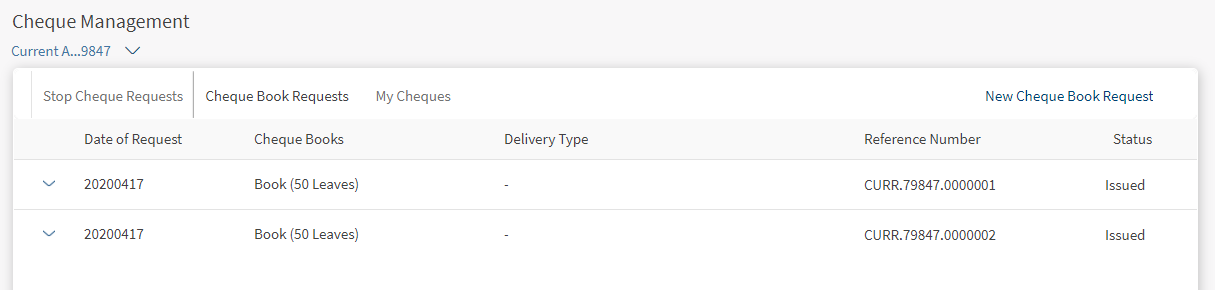
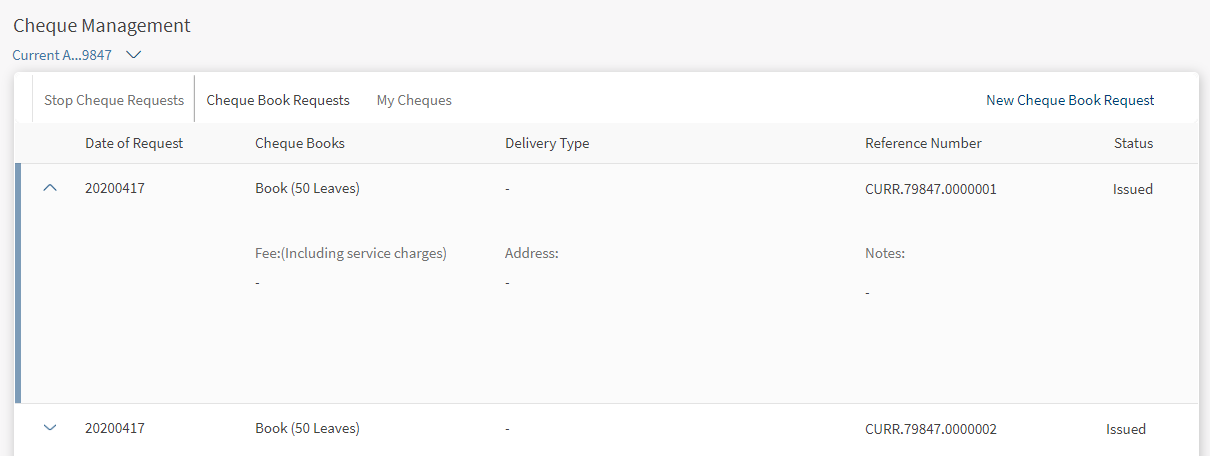
- Click Chequebook Requests. The Chequebook Requests tab displays the list of chequebook request raised by the customer. The screen displays the following details:
- Date of Request
- Number of chequebooks requested
- Delivery Type
- Reference Number
- Status of the request
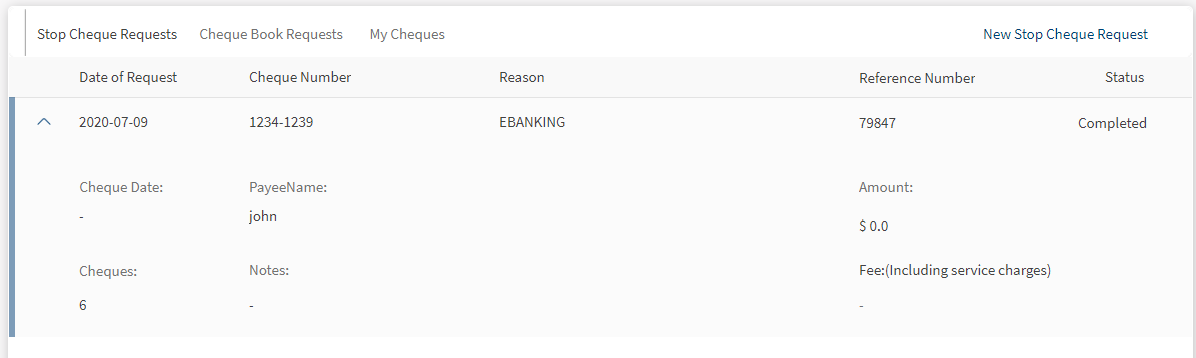
- Click the down arrow displayed beside each row to view the additional details such as:
- Charges for requesting that Chequebook (Fee including Service Charge)
- Delivery address
- Notes
You can perform the following actions in this screen:
- New Chequebook Request
- Withdraw Request
NOTE: If you are using a Transact database, the fields displayed on the screen are not customizable. If you are using any other database (third-party systems), fields can be customized accordingly.
New Chequebook Request
You can request for a new chequebook by creating a request. You can apply for a chequebook using online or mobile banking for your checking/savings accounts.

To create a new chequebook request, follow these steps:
- Click New Chequebook Request in a Chequebook Requests tab.
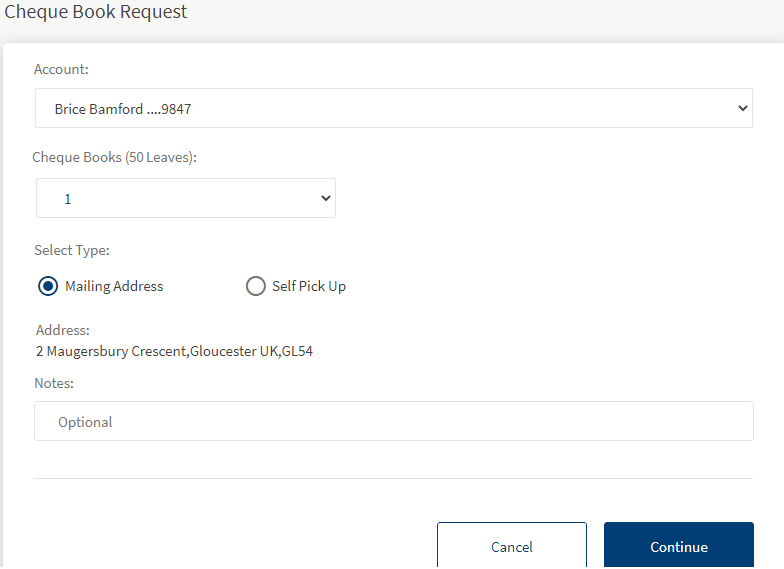
- Enter the following details:
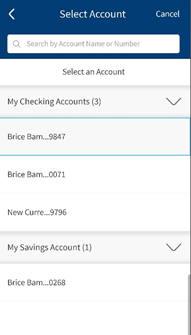
- Account Number – Select the account number for which you are requesting a chequebook. Click the drop-down and select the account. Upon selection, the account number with the name is displayed.
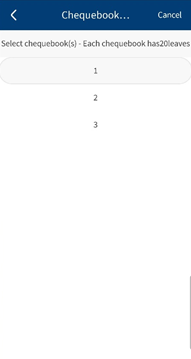
- Number of Chequebooks – You can select the number of required chequebooks from the list. The option is defaulted to 1. The number of books selected is displayed in the summary page.
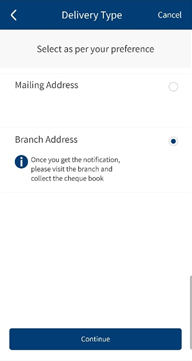
- Select Type – Select the mailing address as your delivery address for the chequebook to be delivered from the list. The address provided during the account opening is selected as the mailing address, by default. The selected delivery address is displayed in the summary page.
NOTE: You can change your delivery address by updating your existing address or adding a new address by navigating to Settings > Profile > Address.
- Alternatively, you can select the self pick up. If you select self pickup, the base branch in which your account exists is selected. You must pick the chequebook from the base branch.
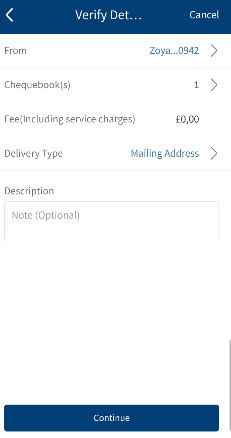
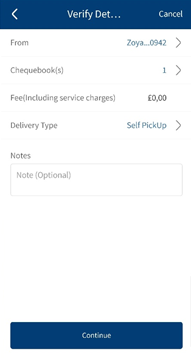
- Click Continue. The application redirects to Confirmation page. The following details are displayed:
- Account number
- Number of Chequebooks
- Delivery type
- Delivery address
- Charges for requesting that Chequebook (Fee including Service Charge)
- Notes
- The details displayed in the Confirmation page are view only. You can edit the detail by clicking Modify option.
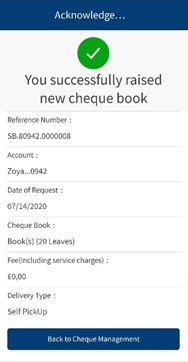
- Click Confirm. The Chequebook Request for that account will be created and an acknowledgment with reference number will be generated.
You can perform the following actions in this screen:
- Click Go to Account Detail to go to the Account Overview Screen.
- Click View My Cheques to view the list of all the Cheques.
Mobile Screenshots
NOTE: If you are using a Transact database, the fields displayed on the screen are not customizable. If you are using any other database (third-party systems), fields can be customized accordingly.
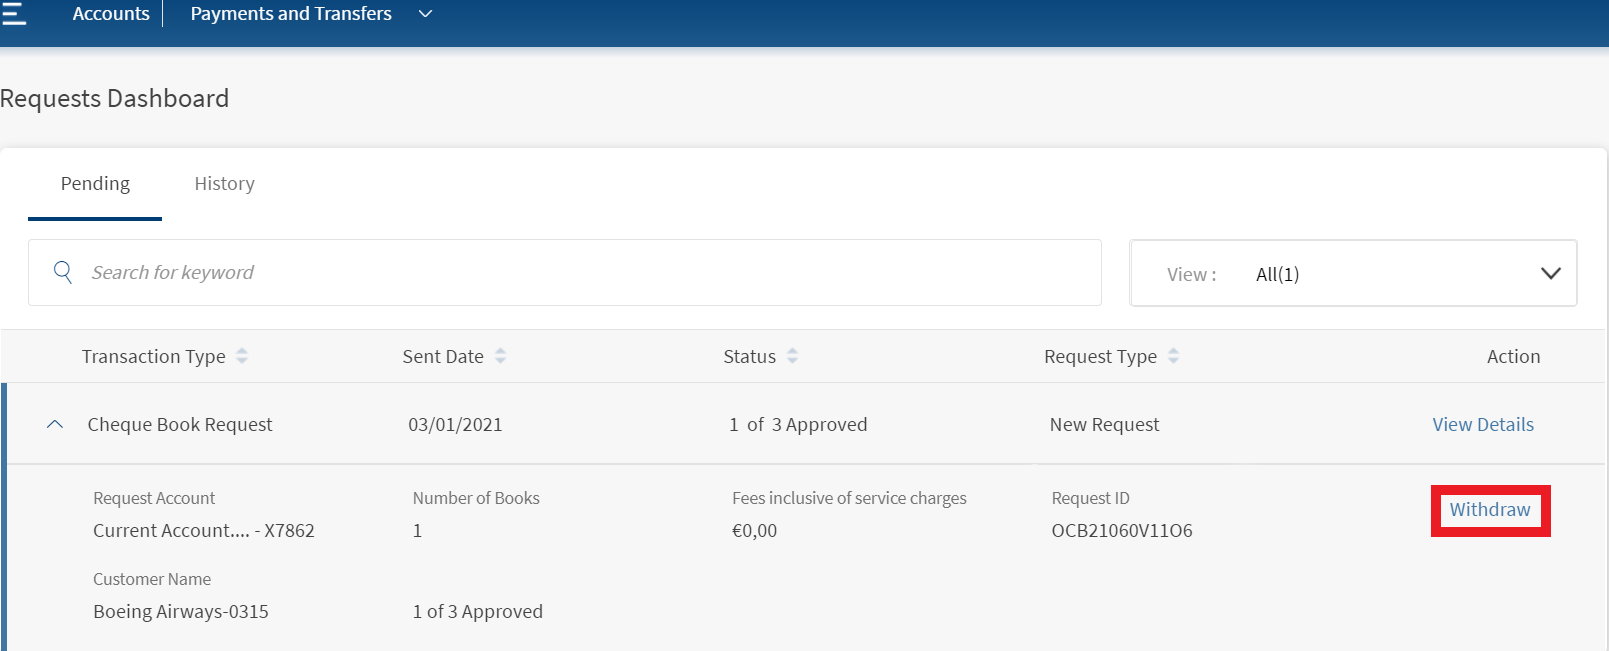
Withdraw Chequebook Request
You can withdraw your chequebook request from the Approvals and Request dashboard. Follow these steps to withdraw chequebook request:
- Go to Side menu > Approvals & Requests > Pending Requests. The Requests Dashboard screen appears.
- Click Withdraw to withdraw your cheque request.
My Cheques
This feature allows you to view the list of status of the cheques that have been previously issued.
To view the cheque status, follow these steps:
- Click Cheque Management from the side menu. The Cheque Management screen appears with the Stop Cheque Requests tab highlighted.
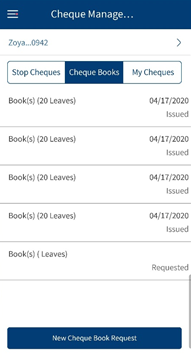
- Click My Cheques. Al the cheques issued by the customer for an account are displayed with their status.
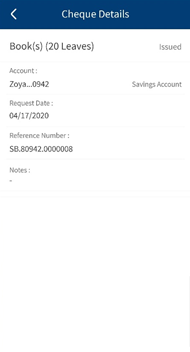
- Click the down arrow displayed besides each row to view the additional details such as
- Reference Number
- Reason for the dispute cheque
- Notes
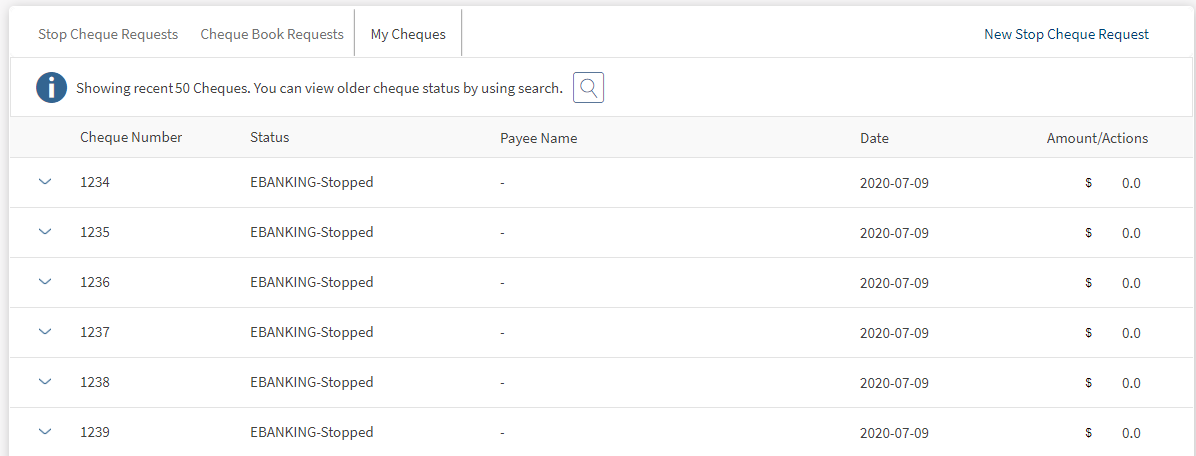
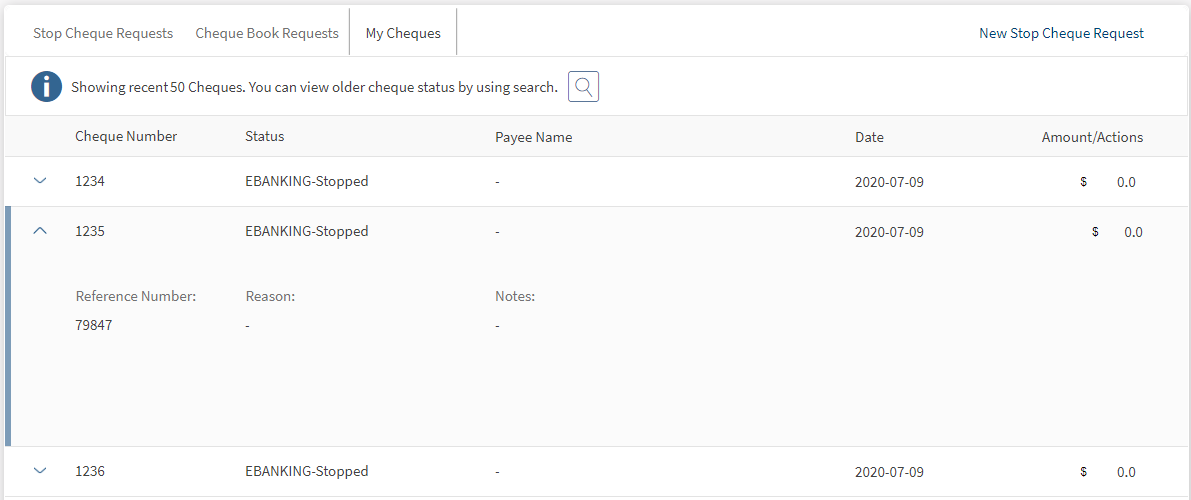
You can perform the following actions in this screen:
- Raise a new stop cheque request
- Search for a cheque request
- Revoke a stop cheque (Cheque with status as Stopped).
Stop Cheque Requests
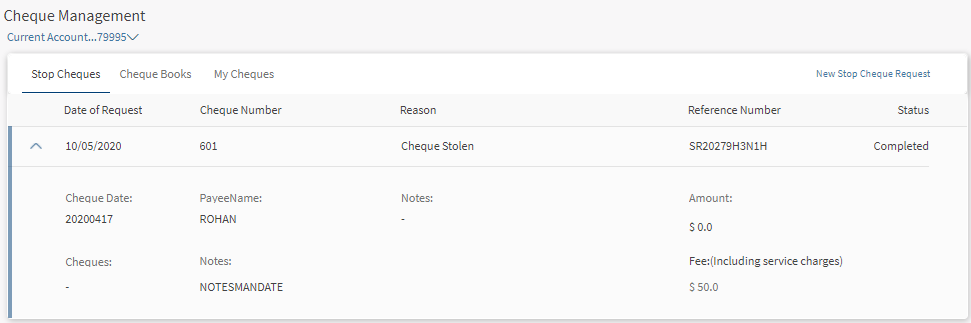
You can stop a cheque payment for the cheques issued. To stop cheque request, follow these steps:
- Click Cheque Management from the side menu. The Stop Cheque Request tab appears.
- The screen displays the following details:
- Cheque Numbers
- Payee name
- Date of Request
- Reference Number
- Fee
- Reason
- Number of Cheques
- Amount
- You can perform the following actions in this screen:
- Initiate a new stop Payment Request
NOTE: If you are using a Transact database, the fields displayed on the screen are not customizable. If you are using any other database (third-party systems), fields can be customized accordingly.
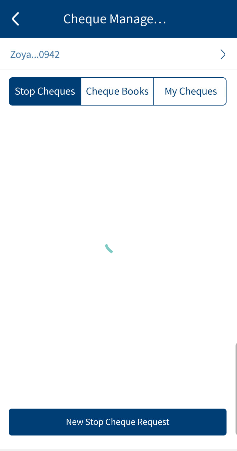
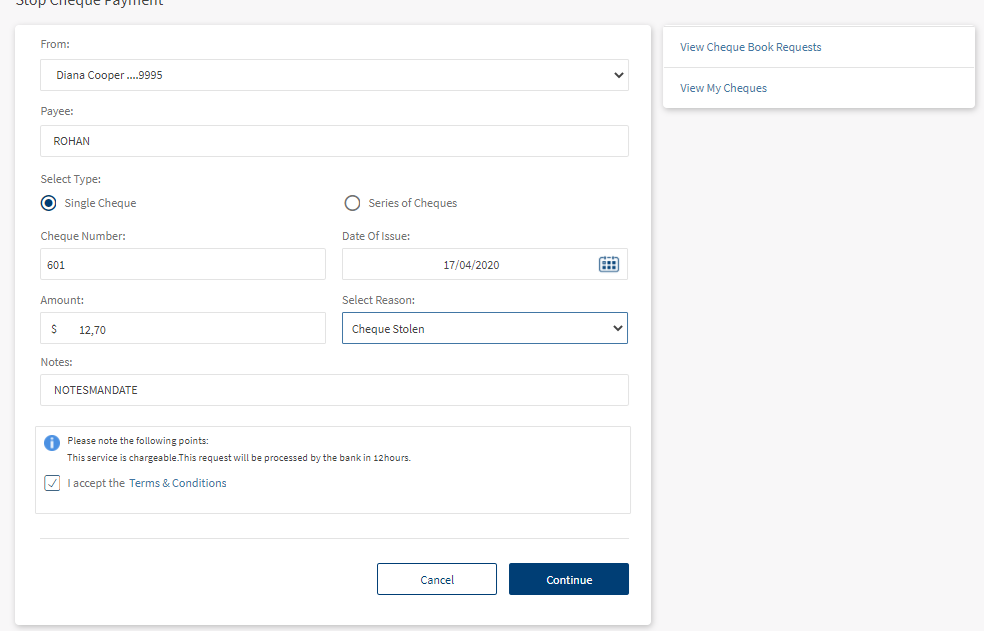
New Stop Cheque Request
Use the feature to initiate a new stop cheque request. To add a new stop cheque request, follow these steps:
- In Stop Cheque Request tab, click New Stop Cheque Request. The new stop cheque request screen appears.
- Enter the following information:
- Account number from which the Cheque has been provided.
- Payee name
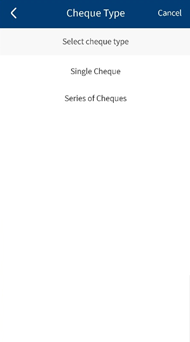
- Select whether it is a single or Series of Cheques.
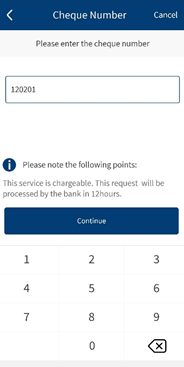
- Cheque number or the Series of Cheque Numbers
When the Cheque number is entered, the system finds out whether the Cheque is already used. If the cheque is already used the system throws an error and the user cannot proceed further.
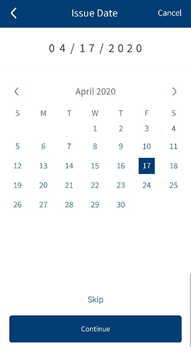
- Date of Issue on the Cheque
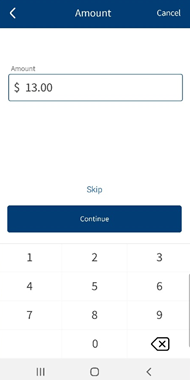
- Amount on the Cheque
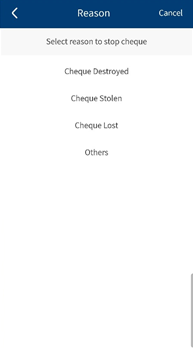
- Select the Stop Reason from the dropdown list. The available options are:
- Cheque Stolen
- Cheque Lost
- Cheque Destroyed
- Funds not available
- Description for the Stop Cheque Payment. The System Displays the Charge associated with that Stop Cheque Payment with the Message below.
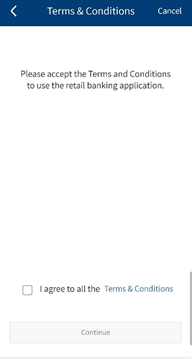
- Select the Check box to accept the Terms and Conditions.
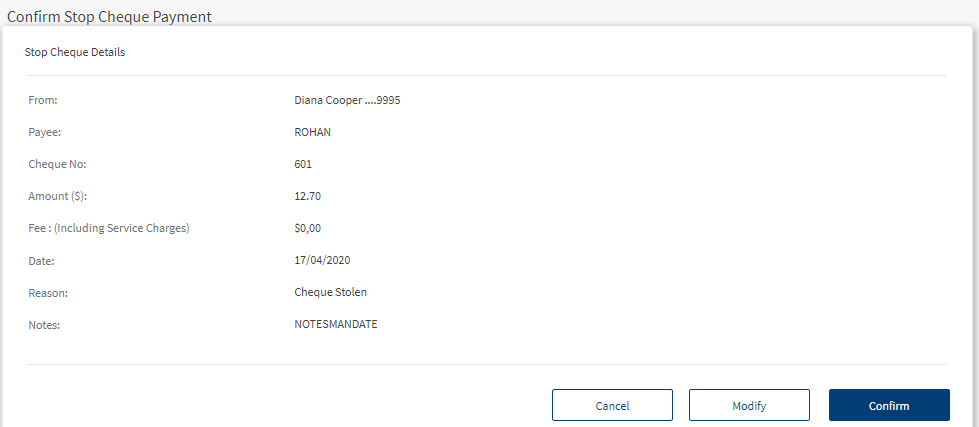
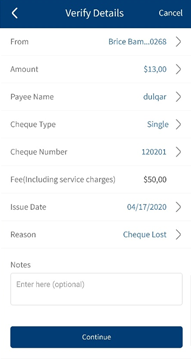
- Click Continue. The System displays the Confirmation Page where the Charge Associated with the Stop Cheque Payment is displayed along with the other details.
NOTE: Click Modify to edit the Stop Cheque Payment Details. Click Cancel to stop the cheque payment.
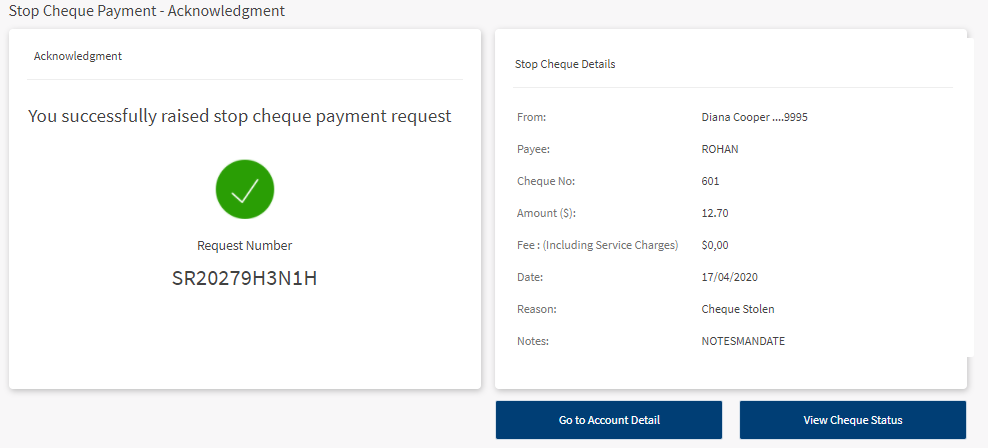
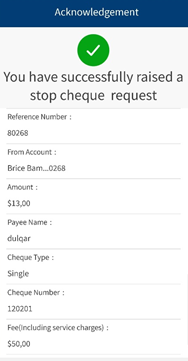
- Click Confirm to confirm the Stop Cheque Payment. The System displays the Acknowledgment screen where the charges associated with the Stop Cheque Payment is displayed along with the other details.
You can perform the following actions in this screen:
- Click Go to Account Detail to go to the Account Overview Screen.
- Click View My Cheques to view the list of all the Cheques.
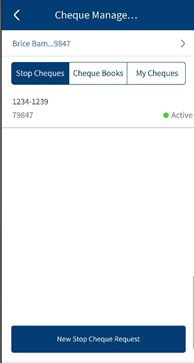
OLB Screenshots
Mobile Screenshots

Revoke Stop Payment
You can revoke a stop payment request raised for a cheque or series of cheques. To revoke a stop payment request, follow these steps:
- Click Cheque Management from the side menu. Alternatively, select an account and click Stop Cheque Request. The Stop Cheque Request tab appears.
- Click My Cheques to view the list of cheques created.
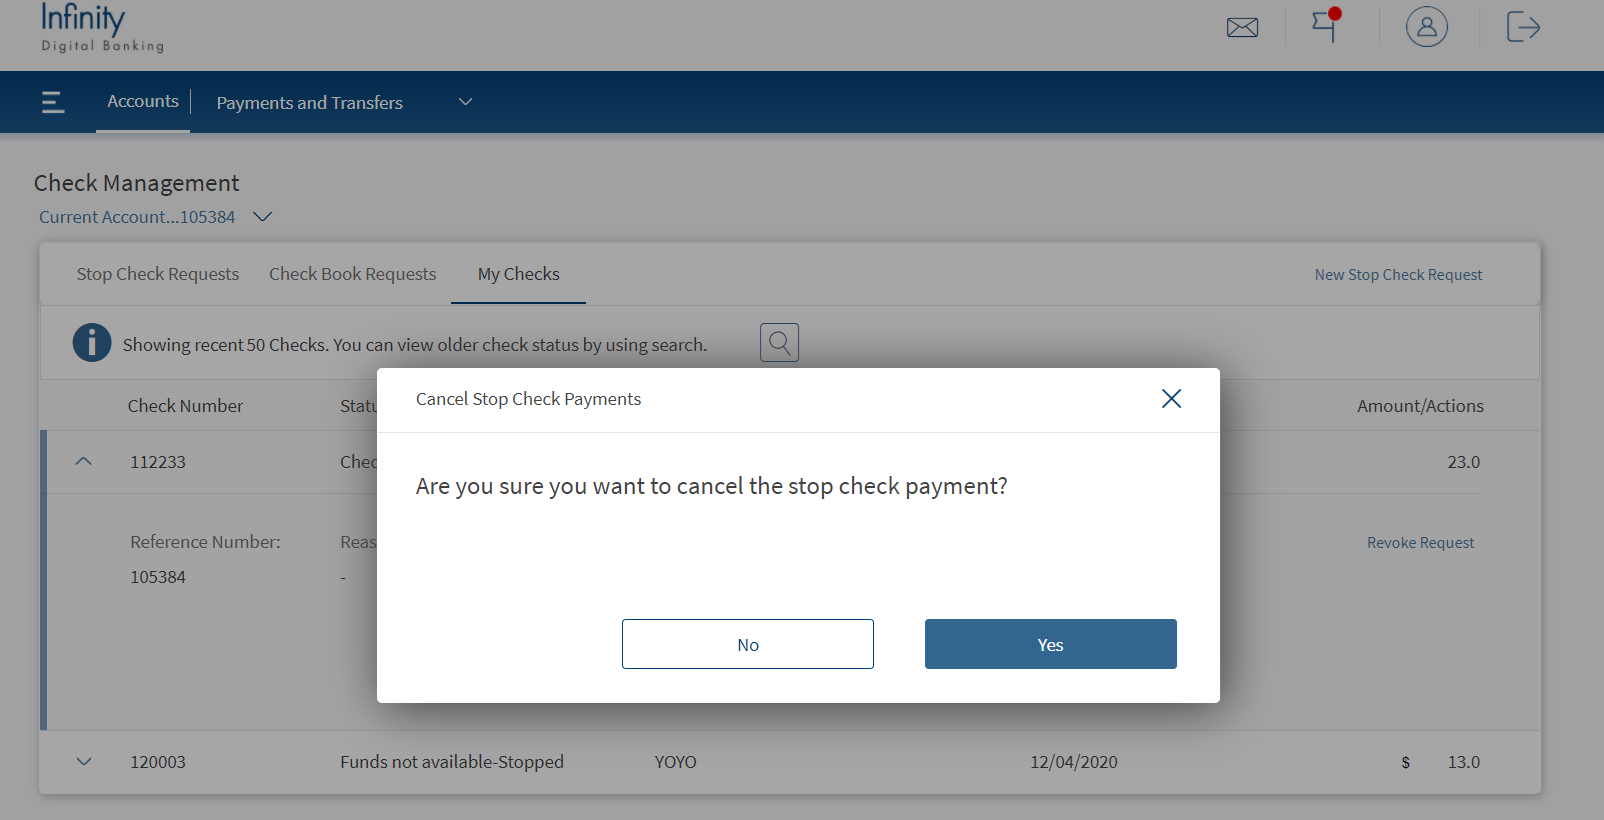
- Select a cheque with the status Stopped and click Revoke.
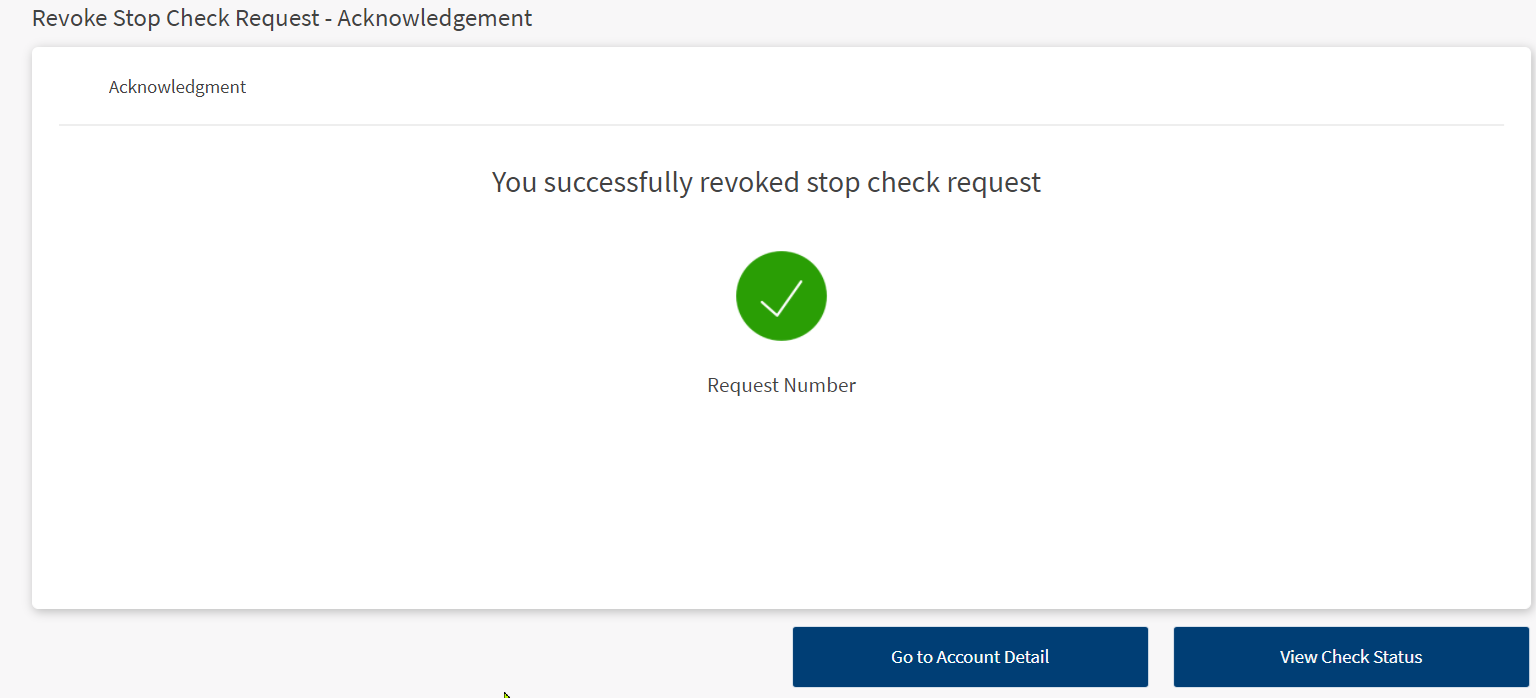
- A pop-up appears for the confirmation. Click Confirm to revoke the Stop Payment Request.
- An acknowledgment screen is displayed with a unique reference number.

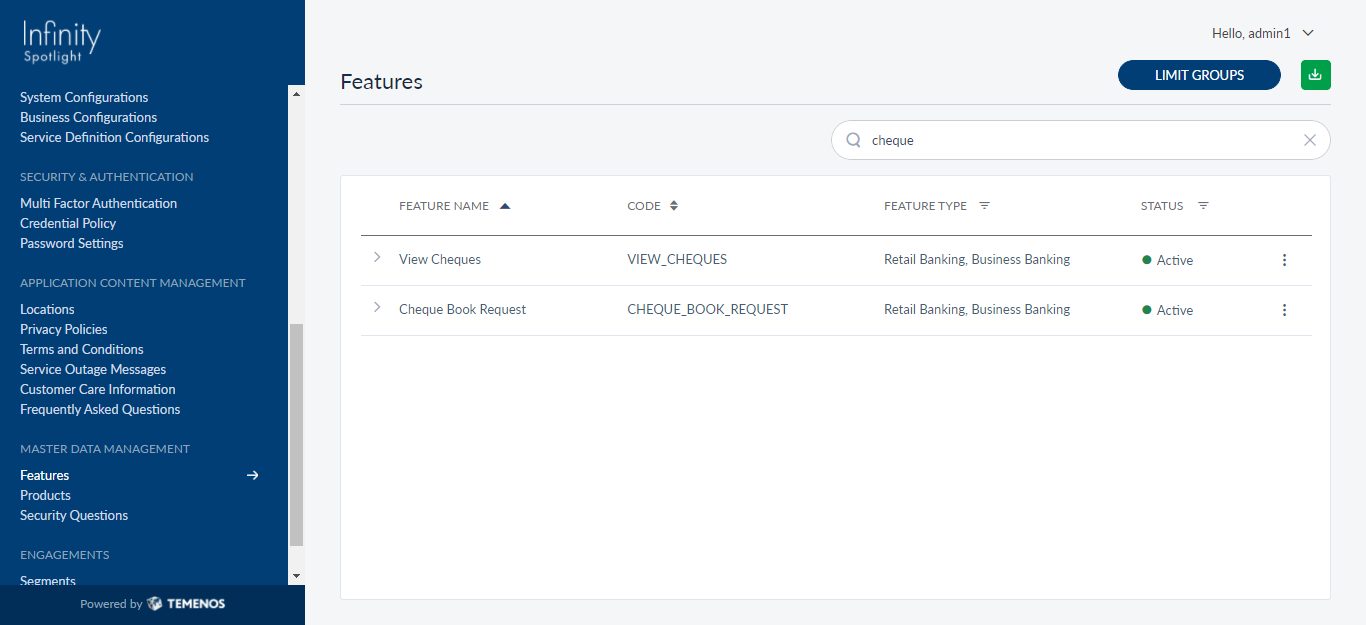
Configurations in Spotlight
A few user permissions at the system level must be configured in Spotlight. The following configurations must be performed in Spotlight under Master Data Management to access the particular feature in OLB/MB.
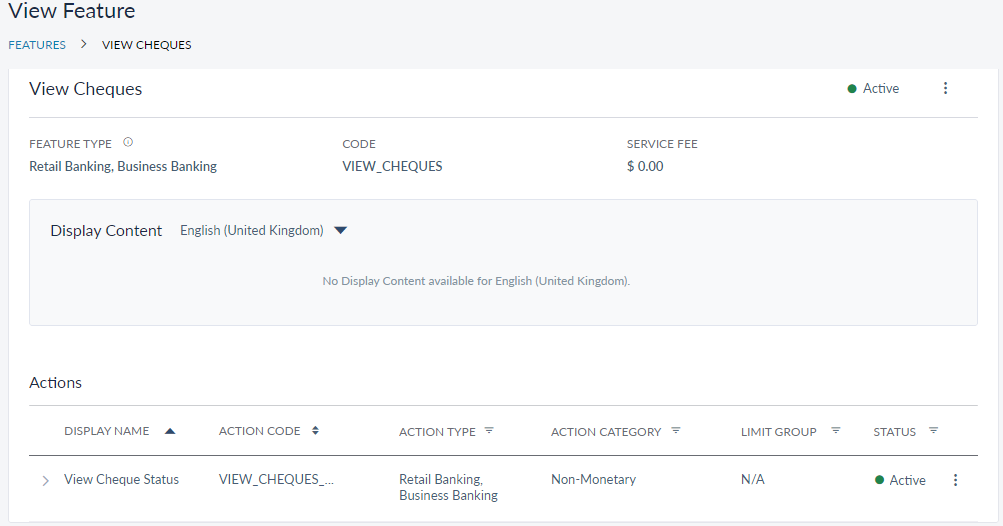
- View Cheques feature must be active to view and access the feature in OLB/MB. Once the View Cheques feature is active, the view cheque status action is enabled.
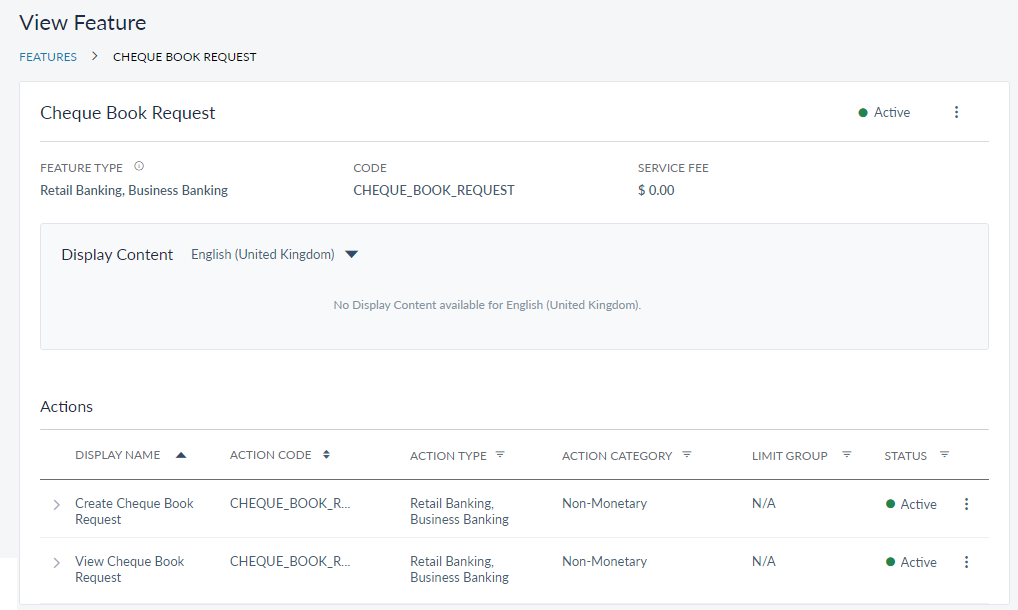
- Chequebook Request feature must be active to create a new chequebook request and view all the chequebook requests created for the selected account. Once the Chequebook Request feature is active, the following actions are enabled:
- Create Chequebook Request
- View Chequebook Request
- Stop Payment Request feature must be active to create a stop payment request and view all the stop payment requests created for their account. Once the feature is active, the following actions are enabled:
- Create Stop Payment Request
- View Stop Payment Request
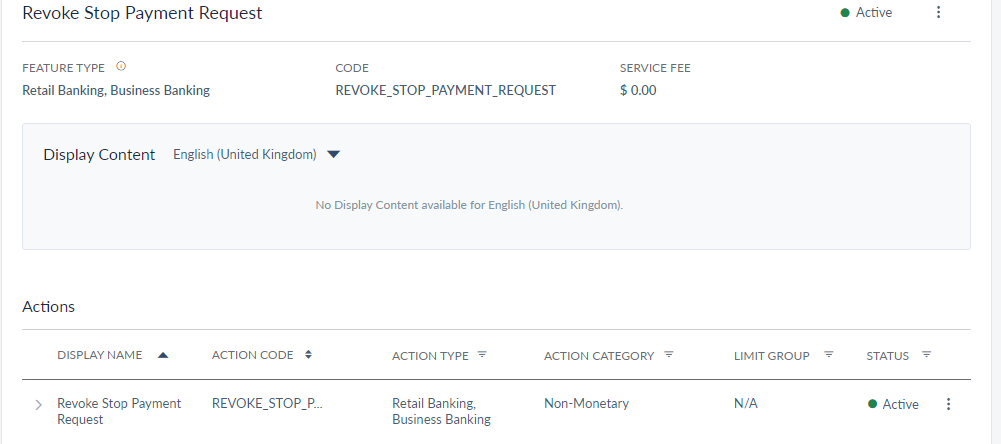
- Revoke Stop Payment Request feature must be active to revoke a cheque with status Stopped. Additionally, stop payment request feature must be active. Once both the features are active, the Revoke option in My Cheques screen is enabled to revoke the stop payment of the cheque.

Audit Logs
When you click on a feature, system generates an audit log to capture the activity. This generated audit log report is recorded in Spotlight. Along with the default values recorded, we can have the following values as part of the captured information:
- Reference Number
- Cheque Number (for View Cheque Status)
- Status (for View Cheque Status)
- Chequebooks (for Create Chequebook Request and View Chequebook Requests)
The flow diagram shows the cheque book request process where multiple approvers are involved and scenarios covering the approval and rejection processes.
APIs
Following are the APIs used in the Cheque Management feature.
| Operation | Method | IRIS API |
|---|---|---|
| getChequeTypes | GET | v1.0.0/reference/chequeTypes?category={categoryId} |
| createChequeBookRequest | POST | v1.0.0/holdings/chequeIssues/{recordId} |
| getChequeBookRequests | GET | v1.0.0/holdings/chequeIssues/?accountId={accountNo} |
| createStopCheque | POST | v1.0.0/order/paymentStops/{accountId} |
| getStopChequeRequests | GET | v1.0.0/order/paymentStops?accountId={accountId} |
| getIndividualChequeDetails | GET | v1.0.0/holdings/cheques?accountId={accounId} |
| createStopPayment | POST | v1.0.0/order/transactionStops |
| listStopPayments | GET | v1.0.0/order/transactionStops/{accountId} |
In this topic
