Deploying TAFJ Application
This section shows the steps required to deploy TAFJ.
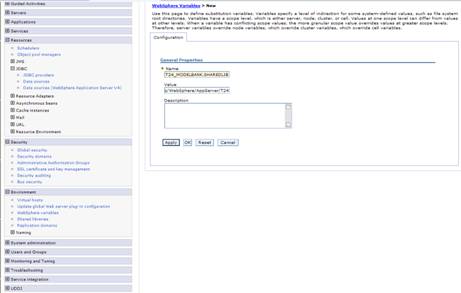
Creating WebSphere Variables
Two WebSphere variables are required for the TAFJ application. TAFJ_HOME points to the TAFJ home directory. T24_MODELBANK_SHAREDLIB points to the Model Bank JAR file.
Procedure
- Select scope as server.
- Click Environment > WebSphere variables > New.
- Name: TAFJ_HOME
- Value: The full path to your TAFJ_HOME folder
- Click OK and save changes to master configuration.
- Repeat steps 1 to 3 with the following details:
- Name: T24_MODELBANK_SHAREDLIB
- Value: The full path to your MODELBANK_HOME folder where you find the ModelBank.jar file.

- Update the tafj.properties file in %TAFJ_HOME%/conf under the key temn.tafj.directory.precompile. This must point to the model bank JAR file. For example,

temn.tafj.directory.precompile = /usr/lpp/WebSphere/AppServer/T24/ModelBank.jar
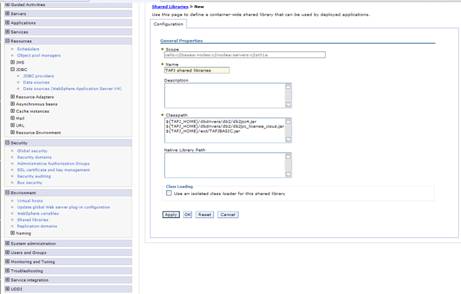
Creating Shared Libraries
Procedure
- Select scope as server.
- Click Environment > Shared Libraries > New.
- Name : TAFJ shared libraries
- Classpath: ${TAFJ_HOME}/dbdrivers/db2/db2jcc4.jar, ${TAFJ_HOME}/dbdrivers/db2/db2jcc_license_cisuz.jar, ${TAFJ_HOME}/ext/TAFJBASIC.jar
- Click OK and save changes to master configuration.
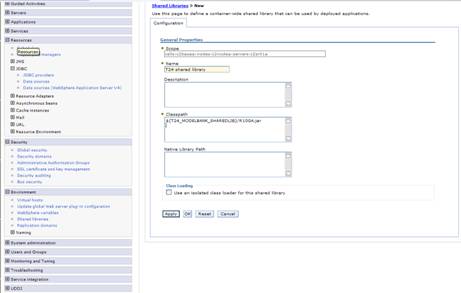
- Repeat steps 1 to 3 with the following details:
- Name : TAFJ shared libraries
- Classpath: ${T24_MODELBANK_SHAREDLIB}/R10GA.jar

Deploying the Application
Procedure
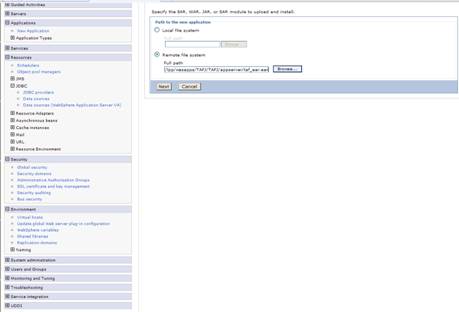
- Click Applications > New Application > New Enterprise Application.
- Select the Remote file system deployment option and specify the full path to the tafj_ear.ear file under the % TAF_HOME%\appserver folder. For example,
- Click Next.
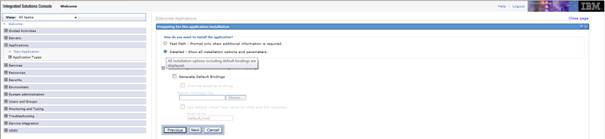
- Select Detailed - Show all installation options and parameters.
- Click Next and perform the following in the next following screen.
- Step 1: Select installation options. Let values default and click Next.
- Step 2: Map modules to servers. Let values default and click Next.
- Step 3: Provide JSP reloading options for Web modules. Let values default and click Next.
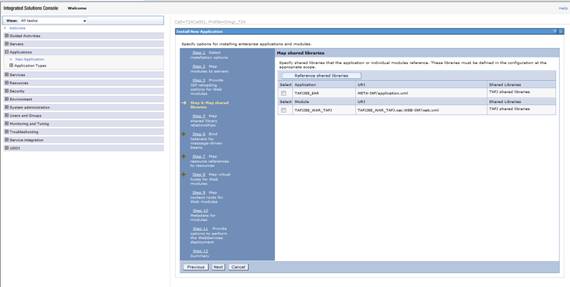
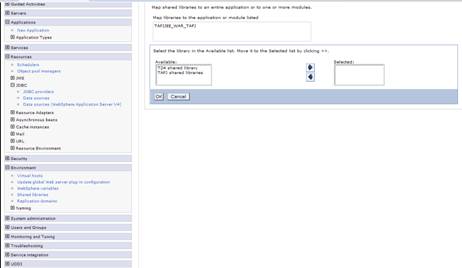
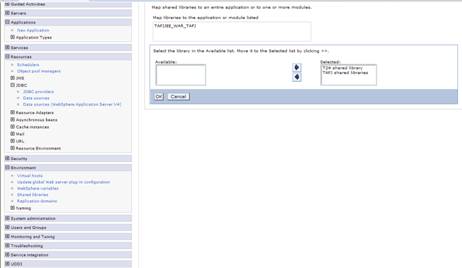
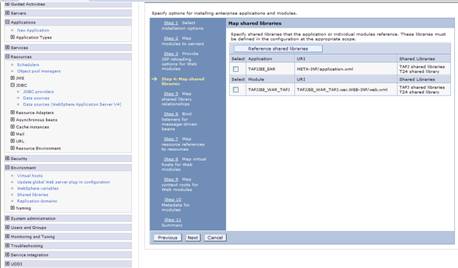
- Step 4: Map shared libraries.

- Select the TAFJJEE_EAR application and click Reference shared libraries.
- Click T24 shared library in the Available box and click the right arrow.
- Repeat for TAFJ shared libraries.
- Click OK.
- Repeat the process for the TAFJJEE_WAR_TAFJ application.
- Click Next and perform the following in the next following screen.
- Step 5: Map shared library relationships. Let values default and click Next.
- Step 6: Bind listeners for message-driven beans. Let values default and click Next.
- Step 7: Map resource references to resources. Let values default and click Next.
- Step 8: Map virtual hosts for Web modules. Let values default and click Next.
- Step 9: Map context routes for Web modules. Let values default and click Next.
- Step 10: Metadata for modules. Let values default and click Next.
- Step 11: Summary.

- Click Finish.
- Click Save.
/usr/lpp/WebSphere/AppServer/TAFJ/appserver/tafj_ear.ear

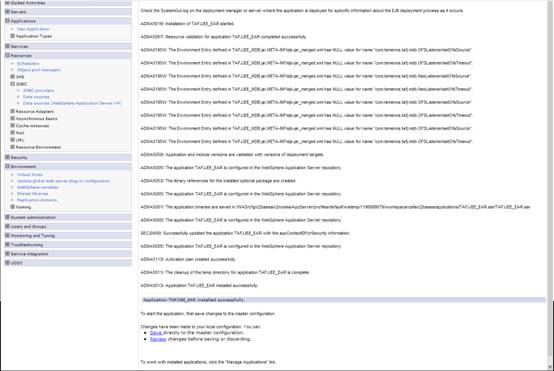
The application should now install.
Changing the Class Loader Order
Procedure
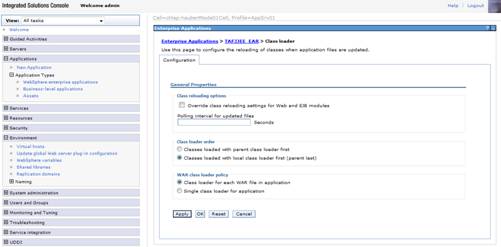
- In the navigation pane, click Applications > Application Types > WebSphere enterprise applications > TAFJJEE_EAR.
- Select Class loading and update detection.
- Select Classes loaded with local class loader first (parent last).
- Click OK and save settings to master configuration.
- Restart the application server to get the TAFJJEE_EAR application to start.
- Once the server is up, verify that the application is started:
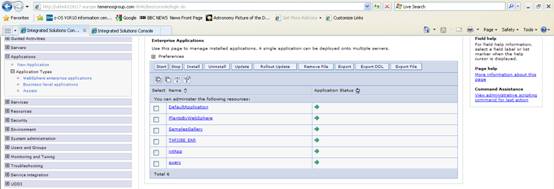
- Click Applications > Application Types > WebSphere enterprise applications.
- Click Applications > Application Types > WebSphere enterprise applications.
In this topic
