Creating JNDI Context
This section shows the steps to create a simple file-based JNDI context and configure the JMS objects in the JNDI namespace.
The applications running on WebLogic Application Server use JNDI objects to connect to the WebSphere MQ queue manager. For this integration, WebLogic and WebSphere MQ should be on the same machine.
Procedure
- Create the C:\LocalArea\Dev\TAFJ\appserver\MQ\MQ-JNDI directory.


- Create the MyAdmin.Config file with the following properties.
Property
Value
INITIAL_CONTEXT_FACTORY
com.sun.jndi.fscontext.RefFSContextFactory
PROVIDER_URL
file://C:/LocalArea/Dev/TAFJ/appserver/MQ/MQ-JNDI
SECURITY_AUTHENTICATION
none


- Open a command prompt as Administrator and set the following CLASSPATH as shown below


- Enter the below commands and press Enter. Change cd to C:\JNDI-Directory, create QueueConnectionFactory and Queue objects by executing the below command.
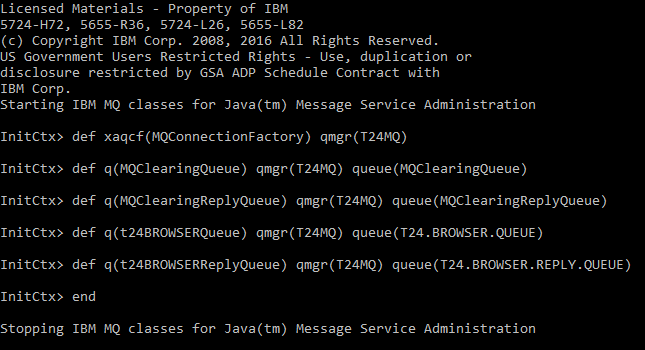
C:\LocalArea\Dev\TAFJ\appserver\MQ\MQ-JNDI>"C:\Program Files\IBM\MQ\java\bin\JMSAdmin.bat" -cfg  MyAdmin.config
def xaqcf(MQConnectionFactory) qmgr(T24MQ)
def q(MQClearingQueue) qmgr(T24MQ) queue(MQClearingQueue)
def q(MQClearingReplyQueue) qmgr(T24MQ) queue(MQClearingReplyQueue)
def q(t24BROWSERQueue) qmgr(T24MQ) queue(T24.BROWSER.QUEUE)
def q(t24BROWSERReplyQueue) qmgr(T24MQ) queue(T24.BROWSER.REPLY.QUEUE)
end
The Stopping Websphere MQ classes for Java(tm) Message Service Administration message appears on screen.

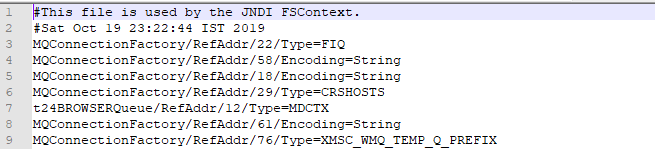
After successful binding of queues, a .bindings file is created in C:\LocalArea\Dev\TAFJ\appserver\MQ\MQ-JNDI.


In this topic
